
Introduction#
Today I would like to talk about the NX Technology that allows us to establish a remote control in the style Teamviewer or VNC, but much faster.
NX is a computer program that makes very fast X11 remote connections, allowing users to access remote Linux or Unix desktops even under slow connections such as those made with modems. NX performs direct compression of the X11 protocol, which allows for greater efficiency than VNC. The information is sent using SSH, so all information exchanged between server and client is encrypted.
As we can see it is a safe protocol, a free application for our case and also very fast since it makes a forward of the X11 of our machine.
Installation Steps#
To install it, only a few steps are needed:
We install the server
//Descargamos la app 32 o 64 bits según corresponda
//https://www.nomachine.com/download/linux&id=1
wget http://web12.nomachine.com/download/4.0/Linux/nomachine_4.0.366_1_i386.deb
//Instalamos
sudo dpkg -i nomachine_4.0.366_1_i386.deb
//Seguimos el Wizard y ya tenemos nuestro servicio autoarrancable y configuración.
sudo reboot
Then we download the client for our OS, and install it accordingly
We open the new application and enter the](http://en.wikipedia.org/wiki/Internet_Protocol “Internet Protocol”) IP [of our server
We’re connected :D
Some final fixes#
The default keyboard is “us” United States, so we will have to modify it so that the correct one is automatically assigned when logging in.
sudo aptitude install nano
cd $HOME
nano .bashrc
//Añadimos al final del fichero
setxkbmap -model evdev -layout es
//Presionamos CTRL +O
//Presionamos S
//Presionamos CTRL +X
ifconfig
//Nos quedamos con los datos de nuestra IP
Now the correct keyboard will be automatically assigned
Connecting from a client#
I will explain this part in summary due to its low complexity
- We download from here the client for our operating system
- We run the application and enter the IP of our server (The one we just copied from the server)
- We enter our user data
- We’re connected!
Connecting via browser#
With version 4 of No Machine, we have notable improvements both in functionality and ease of configuration, as well as in user interface, but we have lost some very attractive features such as access through the web. That’s why if you want to use this feature you should use No machine 3.5. At the moment I don’t need this feature. But if anyone needs it they can write in the comments and I’ll make a post on how to configure everything. The first thing we should know is that in future versions it is possible that this option will be disabled for free users. And it is only allowed through business solutions (paid) but at the moment it is free :D
Via LAN#
Download the web client and install it
wget http://web12.nomachine.com/download/4.0/Linux/nomachine-plugin_4.0.366_1_i386.deb
//Instalar
sudo dpkg -i nomachine-plugin_4.0.366_1_i386.deb
// Debemos instalar un servidor web, por ejemplo apache2
sudo apt-get install apache2
//Hacemos un enlace simbólico al plugin
cd /var/www
ln -s /usr/NX/share/plugin
Now we will proceed to configure the applet
cd /var/www/plugin
//buscaremos la ip de nuestro servidor, seleccionaremos la interfaz y copiaremos la ip
ifconfig
//Editaremos el fichero
sudo nano nxapplet.html
//Con "Control + W" buscamos webserver y modificamos la url por la ip del servidor
//Nos quedará algo como ésto
<PARAM NAME="SiteUrl" VALUE="http://192.168.x.x">
//Presionamos "Ctrl + o" y "Ctrl + x" (Guardar y salir)
We now go to the customer
We create a new connection but we do not enter the user and password data and we connect
Then we go to the My Documents folder (according to OS)/NoMachine and copy the file that has just been created
We pass it to the server by SMB/FTP/USB or whatever
//Accedemos a la carpeta donde está el archivo y despues
sudo mv NOMBREARCHIVO.nxs /var/www/plugin/session/session.nxs
Finally we go to the client PC and enter the following url in the browser
IPDELSERVERENLAN/plugin/nxapplet.htmlWe accept what comes to us, we download java if necessary
Enter username and password
And that’s it!
Through the Internet#
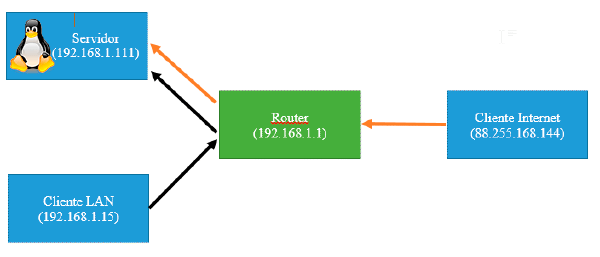
- We will open port 4000 on our router pointing to the ip of our server
- There are thousands of tutorials on the internet on “open router ports”
- But if you want a little guide, here’s a
- Repeat the steps above using your router’s public IP instead of your local network’s IP.